
XLA slit Assembly Cleaning Procedure:
Description: This document describes how to clean the slit assembly of the XLA absorbance optics when dirt or oil has obliterated the optical path and causes strong intensity variations in an intensity scan. This procedure can be performed as routine maintenance and can be accomplished in less than 15 minutes. Degree of difficulty: easy Steps:- With power still turned on, use the Beckman Data Acquisition Software to move the slit assembly to the innermost position. Go to Service -- Hardware Parameters -- Radial Position. Set it to 5.8 and hit return and enter the requested password - 1050.
- Bleed vacuum, remove the rotor and monochromator and turn off the instrument. It is important not have power turned on when the photomultiplier tube (PMT) underneath the slit assembly is exposed to light, as this could damage the PMT.
- Using a phillips screwdriver, unscrew the base plate at the two indicated screws (red arrows). Carefully lift the plate a couple of inches and remove the black rubber seal. There is a wire attached from the plate to the instrument which needs to stay in place. You can move the plate to the side once it is unscrewed and you have removed the gasket. Lift off the slit assembly from the pin, noting the orientation.
- The slit assembly has very small windows so work in some place where you won't lose them.
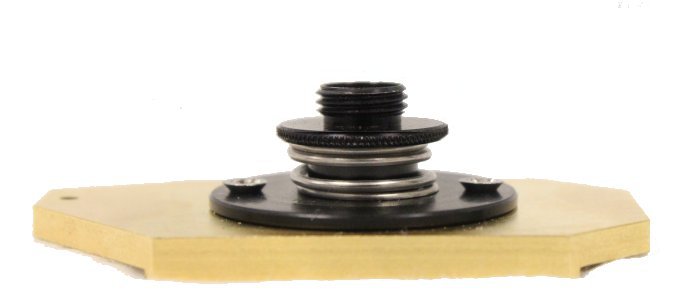
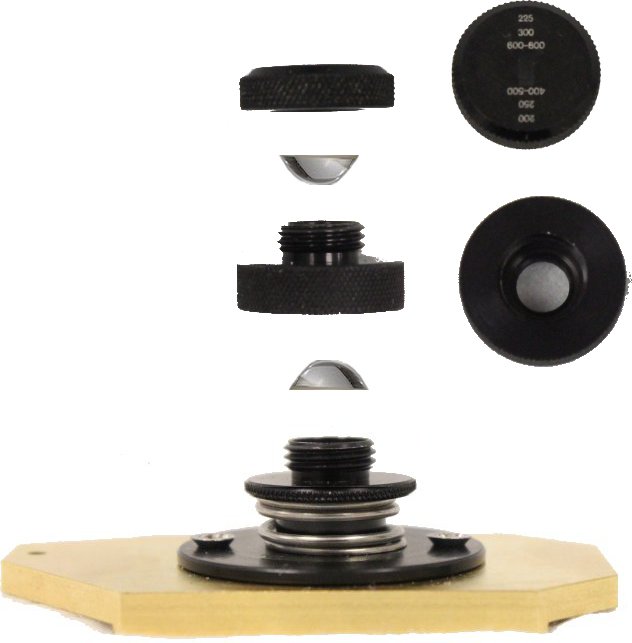
- There are six basic parts to the slit assembly: two lenses with one flat side and one convex side, the bottom brass plate with a spring and spring holder which has an aluminum foil slit glued to the bottom, and three other plastic holders that can be separated from one another and which contain the lenses.
- Unscrew the top plastic holder and there is the first window sitting on top of the next plastic holder. Carefully remove the lens and set aside. Unscrew the second plastic holder from the one below it and the second lens is sitting there. You can leave the next plastic holder with the spring in place.
- Clean the lenses with good quality lens paper, 95% alcohol first, and then pure water. Polish with lens paper and re-assemble.
- Check the slit in the aluminum foil. You can shine a strong light through the assembly and you should see a nice retangular slit in the foil. You can gently rinse the foil with 95 % ethanol and allow to air dry or very gently blow air or nitrogen over the surface to dry and blow off dust. The foil is not glued tightly so this is the point where you don't want to blow the foil off.
- Re-assemble the slit assembly. Place the bottom lens on top of the bottom plastic piece with the flat side to the bottom and the convex side facing up. Screw on the middle plastic piece over the bottom piece with the lens. Place the top lens in the middle plastic piece this time with the flat side facing upwards and the convex side facing down. The lenses form an hourglass. Now screw the last plastic holder with the numbers on it on top and adjust so that the short edge of the rectangle is parallel to the brass base. Here is a video that shows the reassembly of the slit assembly.
- Replace the slit assembly by placing the hole over the pin on the slit drive and adjust slightly so th at the assembly moves over the cover of the PMT smoothly. Replace the safety plate and gasket and tighten the screws.
- Test.